
How to become a wedding photographer in 7 easy steps
An easy to follow step by step guide to get aspiring wedding photographers started. Wedding photography is all about capturing a couple’s special moment for
An easy to follow step by step guide for professional and aspiring photographers alike.
Lightroom is one of the most used software applications for photographers to edit their images. The two most familiar modules are “Library” and “Develop” as they are most commonly used for importing and editing images. However, Lightroom has the ability to create print templates through its “Print” module that allows users to create collages for sharing to online platforms.
The ability to create print templates is something that additional editing software such as Photoshop or InDesign can offer, but being able to achieve this in Lightroom eliminates the need to export files and then continue editing in a different program.
Getting straight into it, this step by step guide will teach you how to create a print template in only 6 easy steps.
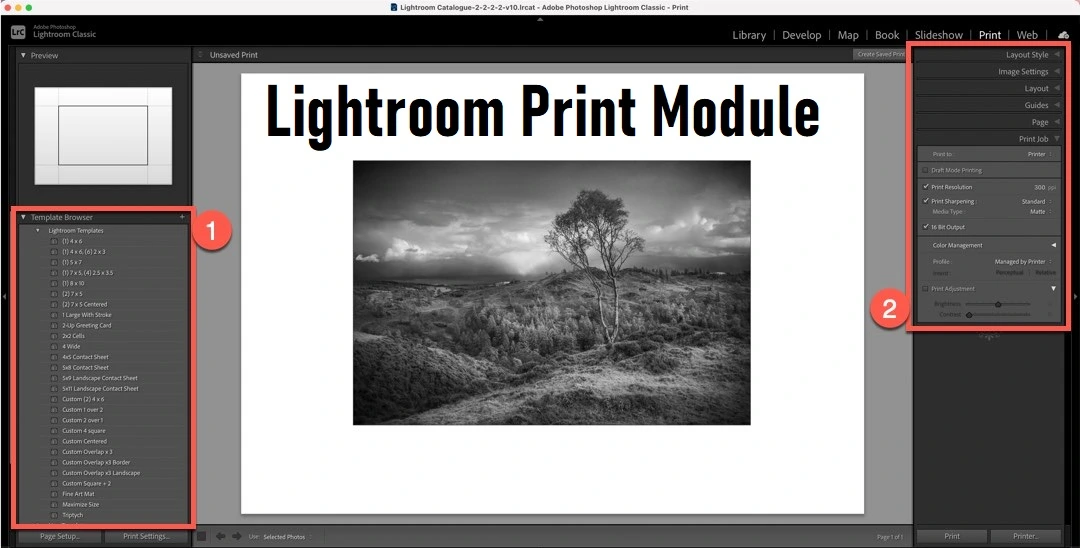
Once Lightroom has been opened, the “Print” module can be easily selected from the selection of tabs in the upper right hand corner shown in the image above.
There are 3 basic steps to follow for setting up the parameters for the template you want to create. Lightroom will need to know the size and type of template you are creating.

There are three types of layouts to choose from namely: Single Image/Contact Sheet, Picture Package, or Custom Package. The type of layout chosen will depend on the purpose of the template. This can always be changed later if you wish to do so.
For a more dynamic design and additional features, it is best to choose the “custom package”. If the goal is to simply create a contact sheet, the flexibility of the “custom package” is not needed and one of the other options will do just fine.
It is recommended to select the “JPEG File” setting from the “Print To” dropdown menu. This will let Lightroom save the image in a JPEG format to your computer instead of sending it to a printer.
The next thing to do is to set the file resolution to 300ppi. The “Print Sharpening” box is up to the user whether to leave it checked or uncheck. It is important to understand that the sharpening tool can not bring back any lost detail. It only creates the illusion of detail by contrasting the edges.
Lightroom needs to know what size the template is going to be. The page settings can be found in the lower left hand corner. There are a number of standard page settings to choose from, but it is also possible to create a custom page size. This feature is especially nifty for creating social media templates.
To create a custom size, click on the “Paper Size” drop down menu and select the “Manage Custom Sizes” option. The custom size can then be saved and named. It’s a good idea to name the template for the purpose it was created in order to find it easily and use it again if needed.
When it comes to choosing a template, Lightroom allows you to choose from pre-designed templates or create a new template from scratch. Pre-designed templates can be found on the left side of the module screen or choose and add cells to an empty template when creating your own. The pre-designed templates can be customized from the template browser.
Pro Tip: In order to keep images from affecting the size and shape of cells, disable the “Lock to Photo Aspect Ratio” function under the “Cells” panel.
Images can be easily selected and dragged into the cells on the template as desired. Once an image is placed, the images can be repositioned within the cell. It is also possible to adjust the cell sizes and the page margins. Below are a few tips that can help with making the adjustments.
Depending on the type of layout chosen, images can be repositioned using the image “Setting” tools.
The cell sizes and page margins can be adjusted in the “Guides” and “Panels” modules. This can be done by either dragging the sliders or by clicking the guides on the actual template and dragging to make the adjustments.
The available guides will depend on the layout that was chosen as shown below.
When using a “Single Image” or “Contact Sheet” layout style, the “Margins and Gutters” option is available with sliders to make any adjustments. The sliders make adjustments simple to perform to achieve the desired look.
The “Custom Package” and “Picture Package” layouts, provide an option called a “Page Grid”. It is a slightly more complex process and requires some knowledge of editing when adding the desired effects to the layout.
Once the desired look has been achieved the collage can be saved by clicking on the “Print to File” button. This can be found in the lower right hand corner of the module screen. From here, a file name can be created and the location where the file needs to be saved can be selected. If the purpose is to share the file to social media, the file size will have to be adjusted to make it smaller.
The purpose of creating a template is so that it can be used again in the future. Saving the template is as simple as clicking on the “+” icon located at the top of the “Template Browser” window.
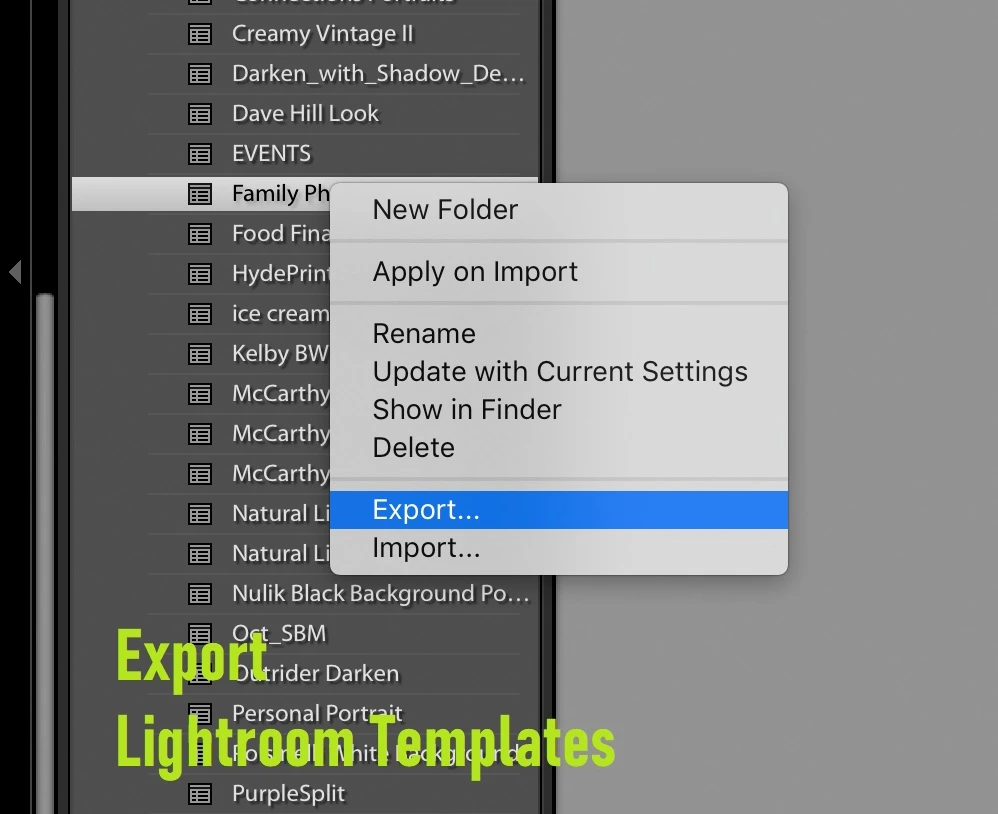
Lightroom allows users to import templates from other users as well as an option to share your templates by exporting them for others to use. There are also a bunch of Lightroom templates that are free to download and use.
It is possible to use images from an array of different folders by creating a collection and adding all the images you want to use to the collection. Lightroom uses collections in the Book, Slideshow, Print and Web Modules to search for images.
For those that are not used to working in inches, it is possible to change the metrics to centimeters in the Rulers, Grid & Guides Panel.
Creating Lightroom templates is a great way to save time creating collages for online platforms or for print. It also allows users to create custom layouts and unique designs to suit your style. For beginners there are multiple free templates to use or download which can easily be customized as desired. More experienced users can create one of a kind templates from scratch with plenty of powerful customization tools.