A step by step guide to create your own customized Lightroom presets to make your images stand out from the crowd.
Adobe Lightroom is one of the most powerful image editing software available and best of all it comes in a mobile version. This means that editing images can be on the go without having to be constrained to a desktop computer.
The mobile version of Lightroom is free to download on both IOS and Android. The application is very user friendly, yet still boasts powerful tools that can turn your creativity and vision for your images into reality.
Although Lightroom comes with some amazing presets that can be applied instantly to an image, you might want to create your own that suits the style and aesthetic you are looking for. Lightroom enables users to create their own presets just for that reason.
The below step by step guide is all you need to start creating fun and unique presets straight from your mobile device.
Before a preset can be created, an imported image needs to be selected from your library and then brought into the “Edit Module”.
The “Add Photos” button can be selected if the image has not been imported yet. This will enable you to select any image that is saved to the device.
A new preset can be created by editing an existing preset or by starting from scratch. Adjustments to the contrast, color and exposure need to be done until the image meets the aesthetic and look you are going for.
The goal is to create a preset that can be applied across multiple images to get a similar look and feel.
By opening any of the options for example “Light”, the exposure and the contrast of the image can be adjusted. Similar to selecting the “Color” option where the vibrance can be adjusted or even the colors in the image can be changed.
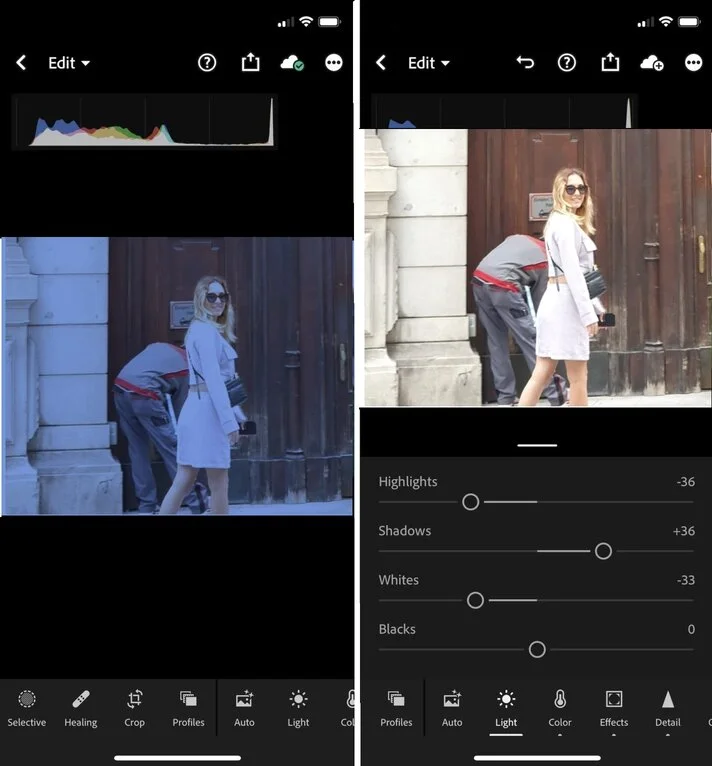
Pro Tip: Do not adjust the white balance as part of the preset. The likelihood of all images having the same white balance is very rare. This can be easily adjusted later when the preset is applied.
Once all of the editing has been completed, click on the three dots (…) located in the upper right corner of the application window and select “Create Preset”.
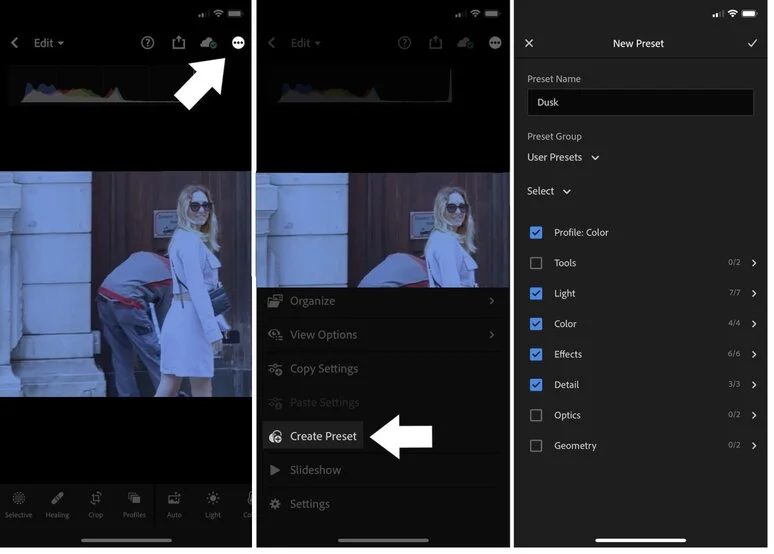
Once the “Create Preset” option has been selected, an additional screen will open up which allows for further customization.
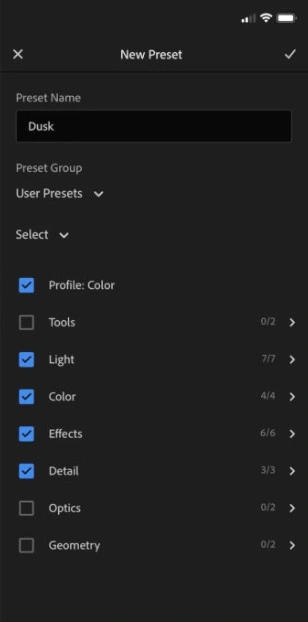
The first step is to give the preset a name. Choose a name that will describe the function of the preset for example “Soft and Warm”. When creating multiple presets, proper naming will make finding the right preset a lot easier.
Pro Tip: You are able to change the name of a preset at a later stage.
The next step is to assign it to a group for example “User Presets”. This not only enables you to find the new preset at a later stage, but also keeps everything organized. If a series of presets are being created it is a good idea to create a new group. This can be done by selecting “Create New Preset Group”
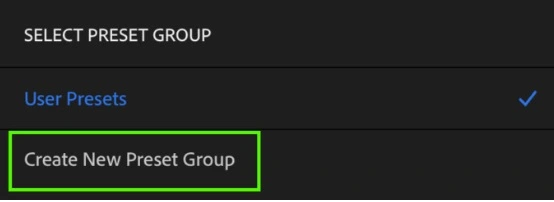
For example, should the series focus on a specific time of day, a group called “Dusk” could be created to save the series of presets in.
The “Select” tab enables you to choose which adjustments to include in the preset. Options such as “cropping” or “lens correction” can be deselected as the same adjustments might not apply to every image.
Further adjustments can be made by tapping on the arrow next to a specific tool as per the below:
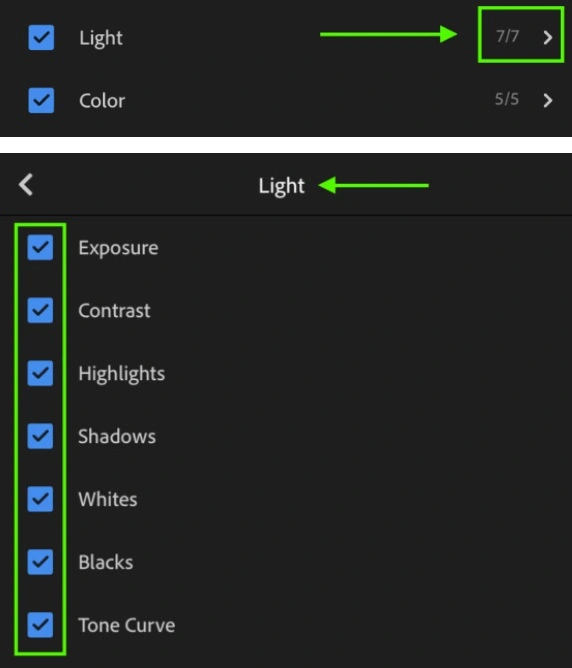
Any adjustments that have a checkmark will be saved to the preset.
Once all adjustments have been finalized, the final step is to click on the check mark in the top right hand corner to save the preset.
Now that the preset has been saved, it can be applied to any photo selected. Simply select a photo from your library or add a new photo by importing it as per Step 1 from this guide.
To apply the preset created, click on the “Presets” button in the navigation bar under the image as shown in the below.
Once the required preset is found, click on the check mark in the bottom right hand corner to apply. As stated before, additional edits such as the white balance can still be made to the preset.
When the image quality is to your satisfaction, it can be saved and exported before sharing the image with others.
Pro Tip: Images can be synced in Lightroom on your mobile device and desktop versions. This will allow for presets to be saved on both devices. The desktop version is however not free and will cost around $9 per month.
Presets can enhance any image to suit the style and aesthetic of the user. It is a good idea to already have an editing style in mind before creating a customized preset.
Is the look vintage or more modern? Are the photos going to have a warm or cold tone? These are all questions that are important to know the answer to when creating a preset from scratch.
Looking at other presets can give great guidance and inspiration for creating your own. There are also a variety of presets created by other experienced users that can be purchased if you are struggling.
The purpose of a Lightroom preset is to quickly edit multiple images to have the same look and feel. It is one of the most powerful editing applications on the market and a favorite with particular Instagram users. Be creative and express your style with custom Lightroom presets.
Next Steps: